Incubator
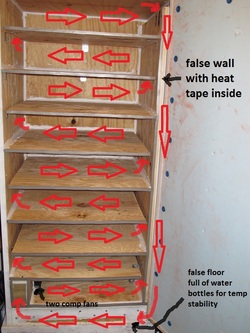
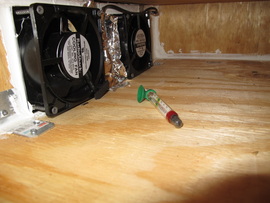
Here is my spin on the do it yourself freezer incubator. I won't go into details with exact measurements because odds are if you decide to gut a freezer or build a custom box yourself the measurements are going to be differenct anyways. Instead I will focus on the main concept of the incubator because no matter what size you build it, the concept of moving the hot air in a zig-zag pattern will stay the same. The idea is to have the heat tape behind the false wall so that the air is sucked in from the top of the false wall and then travels down past the heat tape where it's warmed up. It then travels through the false floor stocked with water bottles to help hold the heat, and finally is pushed across the first shelf by two computer fans. The fans are sealed air tight to the L shaped false floor so that a current is created through the zig-zag shelving heating all of the egg boxes as it rises to the top and is sucked back behind the false wall to be exposed to the heat tape again.
Removing The Insides Out Of Your Freezer
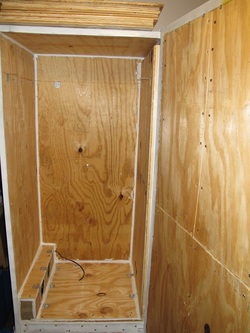
If you decide to use an upright chest freezer or fridge your first step is going to be to remove all the inside plastic. The plastic molding that was inside of the freezer was just clipped on and I just ripped it all out pretty easily. I removed the insulation as well because I wanted to use the blue foam board for insulation to make sure everything was even. Considering I bolted the plyboard to the metal, sealing the insulation inside, I'm sure you could recycle the insulation that is there. You are supposed to have the freeon removed by a licensed professional and not just let it evaporate into the atmosphere but if you decide to do so by cutting the line, please be extremely careful and take precautions to protect your eyes and skin.
Preparing Your "Box"
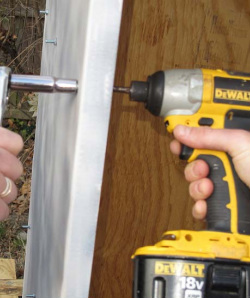
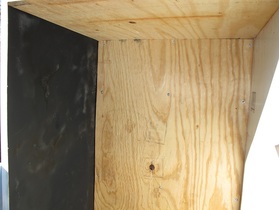
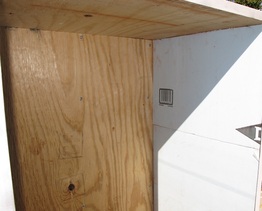
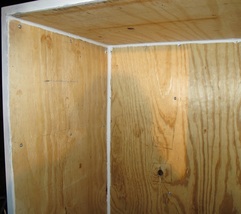
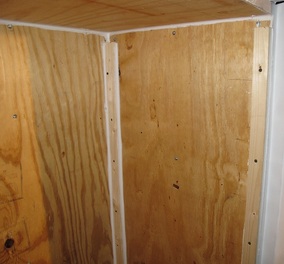
Once I got the the freezer completely gutted I started by measuring and cutting a piece of foam blue board insulation to fit the top and bottom, then covering the top and bottom pieces with 1/4inch plyboard. I then repeated the process of putting a piece of foam blue board insulation and covering that with a piece of 1/4inch plyboard for each of the 3 walls. I secured the board to the freezer by drilling a hole through the metal, foam, and plyboard and then while using a socket wrench to hold the nut in place I used a cordless drill to tighten the screw and bolt the wood to the metal frame. Having an extra pair of hands with this step made life a lot easier! Once I had the 3 walls, top and bottom done, I ran a small bead of caulk in each corner to make an air tight seal.
Braces for The False Wall And Floor
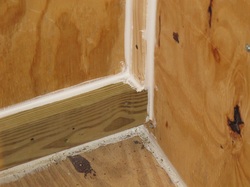
The next step I took was adding a 2x6 along the back wall and the front where the door is. When I gutted my freezer there was a void area down below the bottom of the door so I figured I could load it up with water bottles and seal it, creating a false floor to help hold in some of the heat when I opened up the incubator to check on eggs.
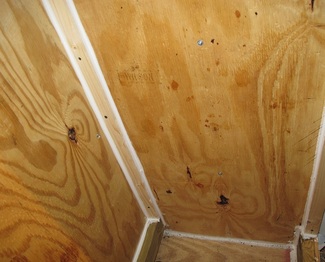
I used a 2x1 trim board which was about 3/4 of an inch thick for the spacer to give my false wall a 3/4 inch gap for the air to flow over the flexwatt. I stopped my trim board braces about 1 1/2 inches from the top to give an opening for the air to be sucked behind the false wall. I screwed all 4 boards in place and again sealed all my joints with a bead of caulk
Installing The Heat Tape, Wire For The Fans,
And Water Bottles
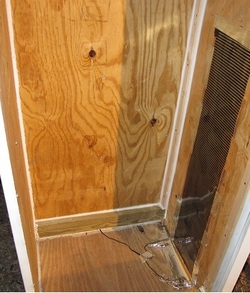
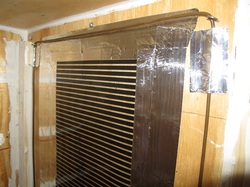
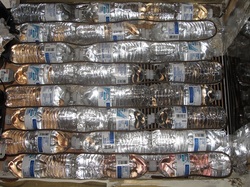
I started by drilling a small hole in the back wall that would be underneath the false floor. I ran a cord in for the heat tape and a cord I would use in a few steps to wire the fans up. For now I just wired up the flexwatt and put a double stack of water bottles on the floor.
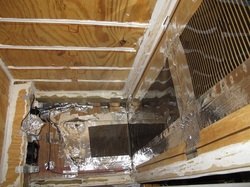
After completeing the entire incubator I realized I hadn't put nearly enough heat tape and the thermostat was always running to the max. Instead of waiting for a problem to occur, I took the entire thing apart and added more heat tape as well as some extra heat cables I had around that were no longer in use. The heat cables were more than likely overkill but after taking it apart, I put them in not wanting to have to take it apart for a 2nd time! I ran one cable around the perimiter of the flexwatt. The other I weaved into the middle of the stacked waterbottles.
I would run the 11 inch flexwatt atleast the entire length of the false wall, and I would even say to go as far as the majority of the false floor. A good thermostat is going to regulate the temperature, so it's better to have a little too much heat tape vs. not enough! The pictures below are the modifications that were made.
Installing The False Wall
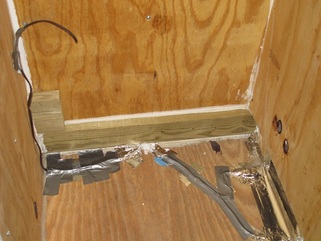
The false wall was cut to only go down to the brace for the false floor which left a nice large opening for the heat to travel through the water bottles and not restrict the flow of air. The top of the false wall was stopped at the top of the braces leaving the 1 1/2 inch gap at the top for the air to be sucked behind the false wall. I applied a bead of caulk on each brace then screwed the 1/4 inch plyboard down making an air tight seal. I then tooled any excess caulk that came out of the cracks once the board was screwed down.
Installing The False Floor,
Fan Mounts, and Fans
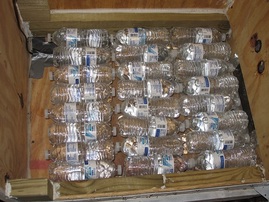
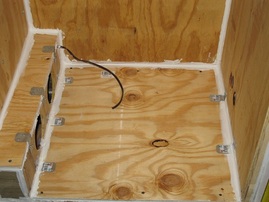
The first thing I did to install the false floor was cut 2 pieces of 2x6 3 inches long and sat one on each floor brace leaning againse the opposite wall as the false wall. I shot a bead of caulk behind each one and screwed them in place using 2.5 inch wood screws shot threw the metal frame, insulation, and 1/4 inch plyboard. These will be used to create an L shaped false floor to mount the fans.
|
I then cut a sheet of 1/4 inch plyboard to fit in the space between the false wall and 2 blocks I just installed. Then I cut a small strip of plyboard to mount on the top of the 2 blocks, and a 2nd small strip for the front of the 2 blocks. On this piece of plyboard for the front I traced and cut out 2 holes the size of my fans. I drilled a small hole to pull my wire through and caulked every joint. Then I used several of the small stainless steal L brackets and 1/4 inch wood screws to give all the joints a little more strength. |
Installing the Shelving
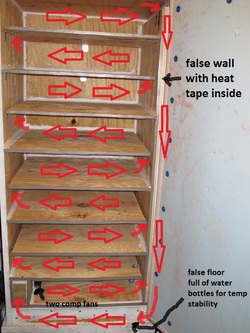
Now here is the portion of the building process that you can incorporate into any design whether you use an old fridge, freezer, or completely build your incubator from scratch. No matter what you decide chances are everything you have up untill this point will be different but if you are trying to use the zig-zag shelving the basic concept will be the same.
Hanging The Shelving
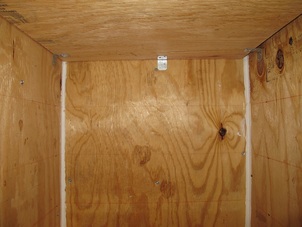
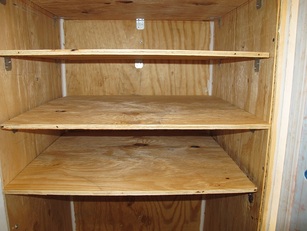
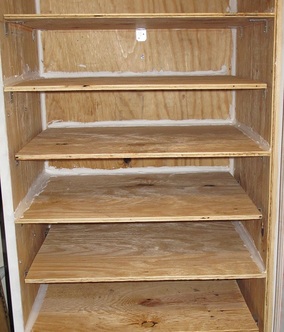
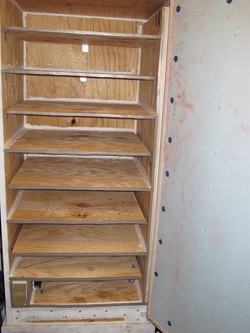
The first thing I did was figure out exactly how much space I would need between the top and bottom of each shelf to give me enough of a gap that the egg boxes I am using will easily go in and out with ease and leave a little extra space for airflow. Once I decided on how much of a gap I needed for each shelf I added 1/4 inch to that measurement because I wanted to mark where my L brackets should be placed. I marked both sides of each wall and then popped a line on all 3 sides for each shelf.
Then starting from the top down I would screw 2 brackets on each side wall, and one in the middle of the back wall. I then placed the shelves, which were cut shorter than the inside dimensions, on each set of L brackets screwing them down to the bracket from the bottom as I went.
Weather Stripping
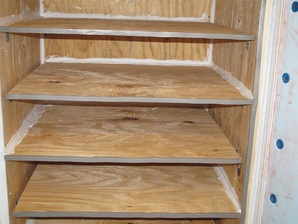
Now that your shelves are in place and caulked tight you just need to get your seal right on the front where each shelf meets the door. Your first step is going to be taking 1/4 inch foam weather stripping and running a piece along the outside edge of every shelf as well as the perimeter of the opening of the incubator. You want to make sure the air is forced to travel up each shelf in a zig zag pattern so the air evenly flows through each shelf full of egg boxes.
|
Place Your Thermostat Probe
And You're Done
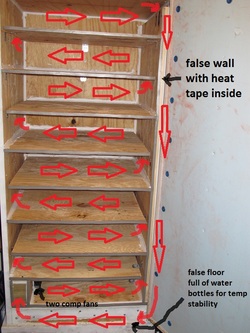
I was going to drill a small hole in the side of the incubator that the false wall is not on to run the probe in, but I just ran the probe in the small gap in the corner of the door when it was opened just for a quick test run. When the door is closed the weather stripping creates a tight enough seal around the probe it really isn't a problem so I just left it. If I end up drilling a small hole for the probe it will just be for aesthetic reasons and not because it will function better. The incubator heats up extremely even with less than 1 degree difference between the top and bottom, and my incubator is 6' tall.
Since the incubator heats up pretty evenly I placed my probe inside a tub that is on the bottom shelf. This way I know the bottom tubs won't overheat as the incubator tries to regain the desired temperatures after the door has been opened and closed.
If you have any questions please feel free to contact us. Thank You.
